عربي
عربي


To view the eventtriggers already set up in Interspire Email Marketer, click Autoresponders in the navigation bar, then View triggers.
Note: Before you set up triggers, you need to enable scheduling (cron jobs).
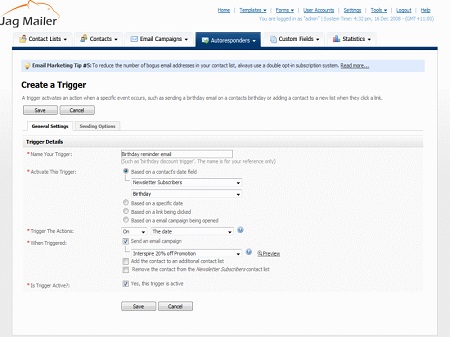
Create a trigger
Click this to set up a new trigger event.
Choose an action
- Select one or more triggers’ checkboxes, choose an item from the list, and click Go to perform the action on the selected trigger (or triggers).
- Select Delete selected trigger(s) to remove the selected trigger (or triggers) from Interspire Email Marketer. Deleted triggers cannot be retrieved.
- Select Mark selected trigger(s) as active to enable the trigger (or triggers).
- Select Mark selected trigger(s) as inactive to disable the trigger (or triggers).
- Select a box belonging to a trigger before choosing an option from the Choose an action list.
- Select the box at the top of the column to select all triggers.
Name
This displays the name that you assigned to this event trigger. This name does not display to the public.
Created
This displays the date on which you created the event trigger.
Triggered by
This displays information about the type of event that sets off the trigger.
• Predefined date displays if you selected Based on a specific date when you created the event trigger.
• Custom field displays if you selected Based on a contact's date field when you created the event trigger.
• Link clicked displays if you selected Based on a link being clicked when you created the event trigger.
• Email campaign opened displays if you selected Based on a email campaign being opened when you created the event trigger.
When
This displays information about when the relevant action occurs.
• Immediately after displays if you selected On or On the date when you created the event trigger.
• [X] hours before displays if you selected Before [X] hours when you created the event trigger.
Note: Even if you selected [X] days or [X] weeks when you created the event trigger, the relevant number of hours displays.
• N/A displays if you selected an option other than those above when
you created the event trigger.
Active
• A tick displays if the trigger is enabled. The relevant action is taken if the trigger event occurs.
• A cross displays if the trigger is disabled. The relevant action is not taken if the trigger event occurs.
Action
• Click Edit to modify the trigger. The Edit trigger screen’s General settings tab displays.
• Click Copy to create a new trigger with the same properties as the original. The new trigger displays with Copy of prepended to its name.
• Click Delete to remove the trigger from Interspire Email Marketer.
Deleted triggers cannot be retrieved.