عربي
عربي


Learn how to add one or more of your email accounts in Mail on your Android mobille or tablet.
To add an email account on your Android device, follow these steps:
Click on Email icon in the main menu.![]()
If this is the first time adding an email account, you will be immediately prompted to add a new account. If you already have an account created, click on the Options button, then Accounts button to create a new account. Type your Email address and Password then click on Next button to continue.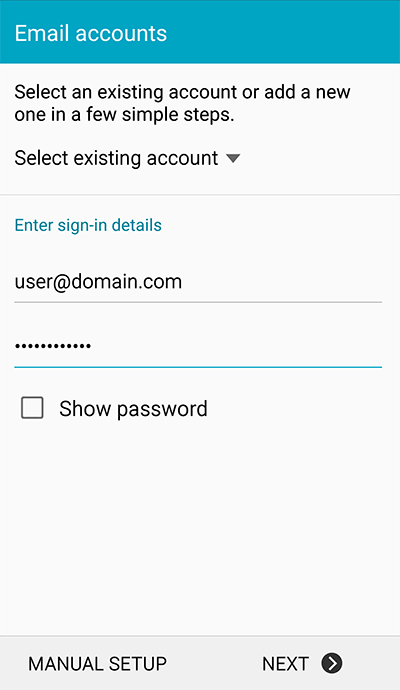
Click on the POP3 account or the IMAP account depending on the type you want to use.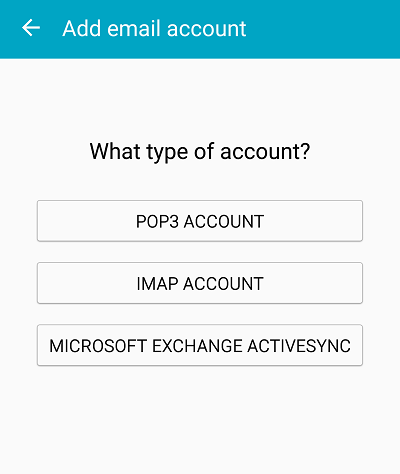
Next you must decide whether you would like to use the POP3 or IMAP email protocol. POP3 is the standard protocol for receiving email from a mail server and it allows you to download all of your emails to one location.
IMAP is best if you access your email from multiple locations, clients and devices as it doesn't require downloading of your email content. We recommend using IMAP settings on Windows Live because if anything were to happen to your computer or mobile device, you would still be able to access your emails.
To find out more about the POP3 and IMAP protocols, watch the following support video.
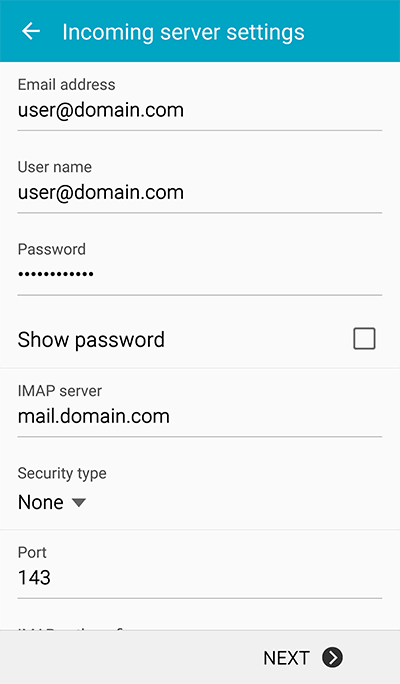
Then, fill in the following details:
- Your full email address in the User name/Email field.
- Your email address password in the Password field.
- If you have selected POP3 then type in mail.yourdomain.com into the POP3 server field.
- If you have selected IMAP then type in mail.yourdomain.com into the IMAP server field.
- 143 for IMAP and 110 for POP3 as the Port number.
- Security type: None.
- Click on the Next button.
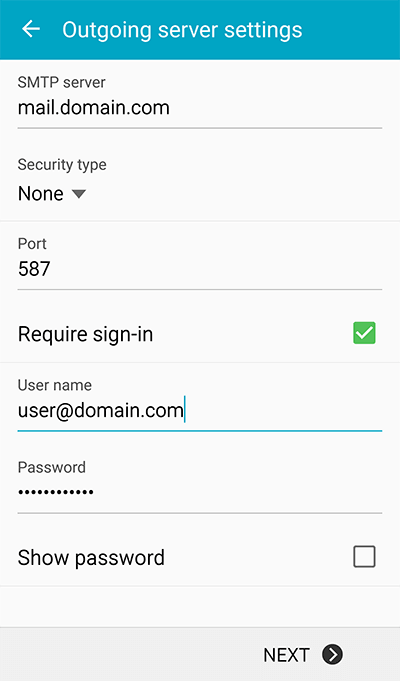
- Your full email address in the User name field.
- our email address password in the Password field.
- mail.yourdomain.com in the SMTP Server field.
- 587 as the Port number.
- Click on the Require sign-in tick box.
- Security type: None.
- Click on the Next button.
For account options, you may choose your preferable settings or leave it as default.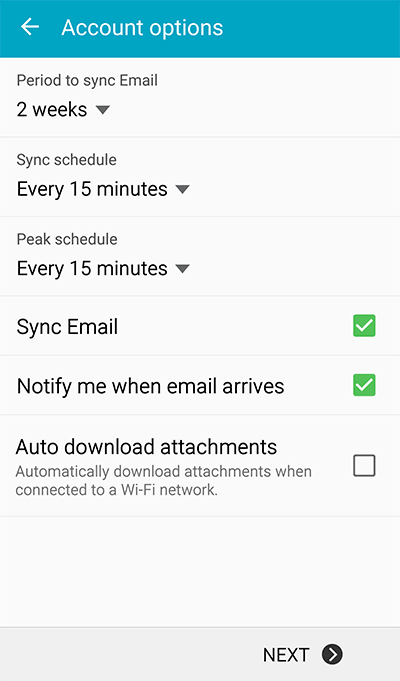
The last step will be enter your name, which will be displaying in your email that you send, after that select "Done" to complete the setup.
Your Android device is now setup and ready to use with your mobile emails