 English


Creating and Editing Email Campaigns
Interspire Email Marketer’s email campaigns are usually based on templates
You can take a template and customize it for use in your campaign; replacing its text with your own, adding or removing sections and images, and
modifying its formatting if required.
Alternatively, you can create a new email campaign without using a template. If you choose to do this, you can build the campaign yourself using the text or HTML editor, or import an HTML file from your computer or a web page.
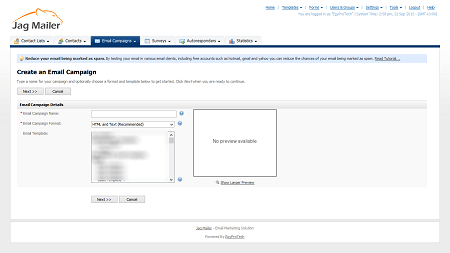
Take the following steps to create a custom email campaign:
- Click Email campaigns in the navigation bar and select Create an email campaign.
- Enter a new Email Campaign Name.
- Select the type of campaign you want to create.
- Select HTML and Text if you want emails to be sent with both HTML and plain text elements (multipart). Email clients that can display HTML messages use the HTML element, and clients that cannot display HTML use the plain text element.
- Select Text if you want emails you send to be sent in plain text only.
- Select HTML if you want emails you send to be sent in HTML only. If you select this option, your emails will not display in email clients that cannot display HTML messages.
- If you want to base this email campaign on an existing template, select the template in the Email template list. A preview of the template displays.
If you do not want to base this campaign on an existing template, select No template in the Email template list.
- Click Next.
Note: If you selected Text only in the previous page,the HTML Content section in this page does not display. Likewise, if you selected HTML only, the Text Content section in this page does not display.
- Specify how you want to build the HTML email.
- If you want to use the built‐in WYSIWYG (What You See Is What You Get) editor in this page, select Create content using the WYSIWYG editor below.
- If you want to use an HTML file on your computer, select Upload a file from my computer. Click the Browse button that displays. A file upload window displays; locate and select the file you want to use and click OK. Click Upload. The HTML editor screen updates to show the new file.
- If you want to use a file from a page on the Internet, select Import a file from a web site and enter the full URL (for example,“http://www.examplesite.com/ examplepage.html”) in the field that displays. Click Import. The HTML editor screen updates to show the new file.
- Customize the HTML email using the editor.
-
Customize the text email using the editor.
-
Check that your email campaign will not be marked as spam by a recipient's email client. Click Check your email for spam.
Note: This checks the text in your email campaign against a list of known spam keywords. However, it cannot guarantee that your campaign will be delivered to all recipients.
If either the HTML or text versions of your email break any rules, take note of the offending text and edit the email campaign to not include the term.
Click to close the Check your email for spam window. -
Check that your campaign displays correctly in a variety of common email clients. Click View your email in different email programs. The Email Validation screen displays in a new window , When you have finished, close the window.
- Configure the Miscellaneous options.
•Select Yes, this email campaign is active if you want the template to be available for use once you have saved it. Otherwise, deselect this option. You can activate the template later.
• Select Yes, archive this email campaign if you want to place the campaign in the archive for the selected contact list. Contacts in the list can see all emails sent to the list in the past (if you provide them with a link to do so). - If you want to test the campaign by sending it to your own email address:
• Enter the email address from which you want to send the test email in the Send preview from this email field.
• Enter the email address to which you want to send the test email in the Send preview to this email field.
• To send the test email, click Preview your email campaign. Check the inbox of the account you entered in the Send Preview to this Email field. - Finish the campaign
• Click Save & keep editing to save the new campaign and remain in this screen to make further changes.
• Click Save and exit to save the new campaign and go to the View Custom Templates screen .
• Click Cancel to return to the View Custom Templates screen without saving the template. Any changes you made are lost.


