عربي
عربي


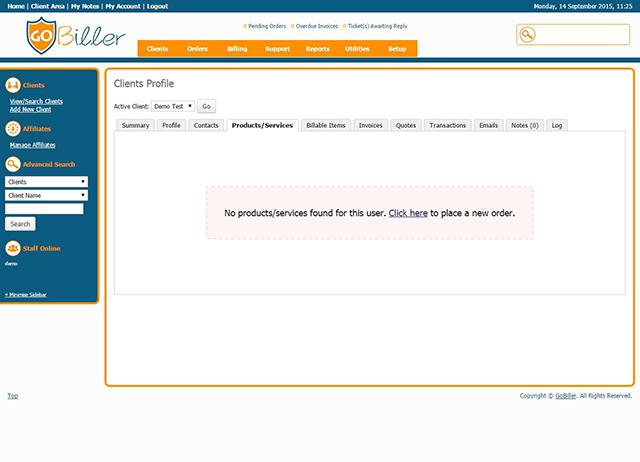
You can locate products/services to manage in a number of ways:
- Search for the Client in Clients > View/Search Clients, and then from the Client Summary page click the ID of the product you want to manage from the list
- Search for the Product in Clients > List All Products/Services > Search/Filter, then click the product ID or domain to be taken to the product details
- Using the Intelligent Search
The Products/Services details page inside a clients profile allows you to view and modify all of a products settings. After making any changes, you need to click the Save Changes button to save your edits.
The first few fields are fairly self-explanatory, such as domain, username, password, dedicated IP and status.
Payment Settings
First Payment Amount
The sum total due for the initial payment for this service. It includes the product price + configurable options + any setup fee - discounts.
This value will be used to generate an invoice when Registration Date = Next Due Date
Recurring Amount
The sum total that will be invoiced for this service on renewal. It includes the product price + configurable options - discounts.
This value will be used to generate an invoice when Registration Date =/= Next Due Date
Auto Recalculate on Save
- This checkbox option located to the bottom right of the product details screen updates the recurring amount field when checked
- It can be used after changing the product, configurable options, billing cycle or promo code to auto calculate the new recurring price
- It is off by default so that any discounted rates or custom pricing are not overwritten as these aren't taken into account by it
Next Due Date
The date upon which the next renewal invoice is due to be paid. A renewal invoice will be generated in advance of this date in accordance with the Automation_Settings for the Recurring Amount.
For one-time services the field is not used so will display "N/A" instead.
Billing Cycle
The frequency with which the product will be invoiced.
For example if this is set to "Monthly" and the Recurring amount "5.00", the client will be invoiced 5.00 once per month for this service. Similarly if this is set to "Annually" and the Recurring amount "50.00", the client will be invoiced 50.00 once per year for this service.
Changing the value will not by itself change the price the client is invoiced, to do this tick the #Auto Recalculate on Save checkbox before clicking Save Changes.
Payment Method
Defines the payment method used for invoices generated by this service. With this option it's possible to use a different payment gateway for each of a client's services.
The client may ultimately pay using a different payment method if permitted in the General Settings.
Promotion Code
If you wish to apply a promotional discount to this service, select it from this dropdown menu. Changing the value will not by itself change the price the client is invoiced, to do this tick the #Auto Recalculate on Save checkbox before clicking Save Changes.
Subscription ID
Certain third party payment gateways (namely PayPal and 2Checkout) use this field to store the ID number of their recurring subscriptions. It means that when a payment is made by thye subscription it can be associated with this service in GoBiller.
Running Module Commands
If the product/service is linked to a module, you will have a Module Commands row towards the bottom of the page. This allows you to execute any of the commands available in that module. Modules can have custom functions but the most common ones are:
- Create - runs the creation routine and sets the product status to active
- Suspend - runs the suspension routine and sets the product status to suspended. You will be prompted to enter a suspension reason, leave it blank if the client has an unpaid invoice and you want the account automatically unsuspended when paid.
- Unsuspend - runs the unsuspension routine and sets the product status back to active
- Terminate - runs the termination routine and sets the product status to terminated
- Change Package - runs the upgrade/downgrade routine for the selected product
- Change Password - runs the password modification routine for the last saved password value
Addons
Product addons allow you to bill for additional items related to the main product but on independant billing cycles from the product (unlike Configurable Options which have to bill on the same cycle)
Addons can be preconfigured in Setup > Product Addons but you can also create custom addons for specific clients which aren't predefined for flexibility
Preconfigured addons can be ordered by clients from the client area product details page
Mananging Addons
The Products/Services details page shows the number of addons a product has with a Click here to Manage link just below the domain field
To view/edit or delete addons you need to click that link and a popup will open
Any existing addons will be displayed with edit and delete icons for managing them
Adding Addons to Users
To add a new addon, click Products/Services in Clients Profile.
Next click on the link Click here to Manage beside the Addons label, and then click Add New Addon button.
If using a predefined addon, simply choose it from the dropdown and leave the name, price and billing cycle fields empty as they will all be automatically set
Alternatively, if adding a custom addon specific to this client, leave the Predefined Addon set to None and enter a custom name, price and cycle
If you would like to invoice for the new addon immediately then you don't need to do anything as that will happen by default, or alternatively if you don't want to invoice yet you can just untick the generate invoice checkbox
Once happy with the selections, click Save Changes to complete the process
Overide Auto Suspension
- This option can be used to allow extra time for payment to be made for specific individuals
- It allows you to set a date to hold the suspension until and then it will only suspend if it's still unpaid when that date is reached
- The checkbox to enable it is at the bottom of the Products/Services details tab under a Clients Profile
- Tick that box and then in the date field that appears, choose the date you want to overide the auto suspension until
- Entering the date 00/00/0000 will permanently prevent the product from being suspended.
Cancelling a Service
Auto Terminate/Fixed Term
You can setup products to automatically terminated after a set number of days from the date of signup. For more information refer to Configuring Products/Services.
Clients Self Service
GoBiller can completely automate the process of product cancellation or wait for manual confirmation. To do this navigate to Setup > General Settings > Other and enable the Show Cancellation Link option.
Clients can then request cancellation of any of their products & services directly from the client area.
To fully automate cancellation and have the module terminate command run (for example to remove the Servies account from the server) tick the Setup > Automation Settings > Cancellation Requests option.
Now when the cron runs any services with a cancellation request due today will be removed from the server and the status changed in GoBiller to Cancelled. The process runs as follows:
- Client clicks Request Cancellation button on the product details page in client area
- They're prompted to provide a cancellation reason and provided 2 choices for the cancellation - either Instant (on next cron run) or at the End of the Current Billing Cycle.
- If a matching domain exists under the client's account in active status with Auto Renew enabled, the customer is given the option to disable auto renew too - thereby leaving the domain to expire.
- Any unpaid invoices for the product will be cancelled (if enabled)
- A notification email is sent to administrators and you will be able to review the reason provided in Clients > Cancellation Requests.
Manual Cancellation
If the Cancellation Request setting is not enabled then at this point you must navigate to the cancellation requests page, click through to the service page and click the Terminate module command button to remove the account from the server. The cancellation request is then moved from the Open Requests page to Completed Requests.
Automated Cancellation
If the Cancellation Request setting is enabled the cancellation request will be actioned when the daily automation cron runs on the appropriate day. For example if the Immediate option was selected it will be terminated on the next cron run, if End of Billing Period was selected it will be terminated when the cron runs on the service's Next Due Date.
Admin Scheduled Cancellations
As an admin user, you can schedule the termination of a product at the end of the currently active period by going to the Products/Services tab, ticking the Auto-Terminate End of Cycle option and optionally entering a reason/note for it. Any unpaid invoices for the product will be cancelled and will suppress any further renewal invoices from generating for this product and terminate it when the next due date is reached. The "Cancellation Requests" setting in Setup > Automation Settings must also be enabled.
Admin Immediate Cancellation
Finally, if you want to cancel or terminate a product or service immediately then you simply need to locate the item you wish to cancel, and from the Products/Services page, click the Terminate button if the product is linked to a module or if not, manually change the dropdown status from Active to Cancelled. Once you've done this, no further invoices will generate for the item.
Upgrades/Downgrades
Admin Area
If you would like to change the product/service a client is assigned to and automatically charge or credit the difference for that change then you need to use the Upgrade/Downgrade process. You'll find the option for this next to the Products/Services dropdown menu on the Products/Services Details page within the clients profile. To use it, simply navigate to the product you want to change, click the Upgrade/Downgrade link, and in the popup that appears make the new product & billing cycle selections as required and it will give you a preview of what the charge will be for the remainder of the current cycle and allow you to create an order/invoice for that change if happy.
Client Side
Clients can also place orders for upgrades & downgrades themselves if you have permitted it in the product configuration. This allows clients to order upgrades/downgrades and complete them automatically without the need for any staff involvement.
For more information, including how to allow clients upgrades and how the upgrade charges are calculated, please refer to the Automated Upgrades and Downgrades section
Manual Upgrades
There may be occasion when you wish to make an upgrade without placing an upgrade order (such as a free upgrade) or processing the upgrade before the client has paid for it. To achieve this:
- Navigate to the client's Products/Services tab,
- Change the product from the dropdown menu,
- Tick "Auto Recalculate on Save" checkbox,
- Click Save Changes,
- Finally click the "Change Package " Module Command button to make the change on the server.
Moving a Service to another Client
- From the Products/Services tab of the service you want to move, click Move Product/Service to Another Client located at the top-right of the page
- A popup box will appear (you will need popup blockers disabled to use this)
- In the popup enter the ID of the new owner. If you don't know the client's ID the Search field can be used to search by name, company or email address. Click the client's name and the ID will be filled in.
- After selecting the desired click, click the Transfer button
- The item will then be transferred, the window will close, and the original window will refresh to show the product under its new owner.
N.B.Moving a products/service between clients within GoBiller will not have any affect on the account on the server.Invoices
Invoices cannot be moved between clients, therefore when moving a product/service any invoices will remain under the old owner. Therefore it would be advisable to check the old owner's Invoices tab for any unpaid invoices for this service and cancel them. If you wish to invoice the new owner for the service, move the Next Due Date forward/back by one day and a new invoice will be generated when the cron next runs.
Misc. Options
Admin Notes
Here staff can enter private notes about the client to be displayed to other staff viewing this service under the Products/Services tab. Notes entered here are separate from those entered under any other service, domain or the client's Summary tab.
Deleting a Product/Service from a Client
- From the Products/Services details page of the product you want to delete, scroll to the bottom and click the red Delete link
- After clicking this link, you will be asked to confirm if you are sure you want to delete the item
- If you click No you will be returned to the page, if you click Yes, the item will be deleted and you will be taken to the next product/service under that client
Note: Deleting a product from GoBiller will not terminate it on the server. If you wanted to remove it from the server aswell, you need to run the Terminate Module Command as explained above before deleting the record from GoBiller.
Send Message
Use the dropdown located at the bottom of the page to send a 'Product' type email template to the client, or select the "New Message" option to compose a new email from scratch. General and Domain type emails can be sent using the dedicated dropdowns under the Summary and Domain tabs.
Resending Product Welcome Email
To re-send a product welcome email simply navigate to the client's Products/Services tab and click the "Resend Product Welcome Email" button at the bottom of the page.